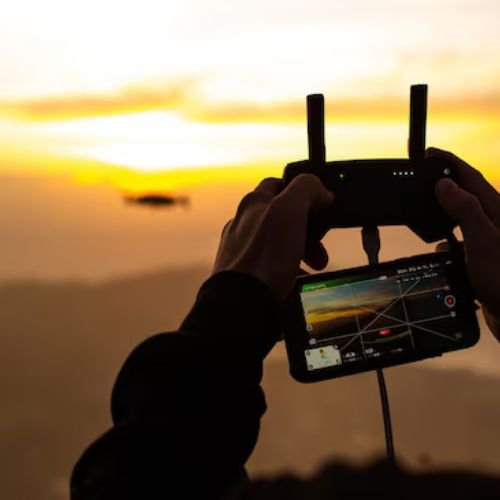
Drone camera settings play an important role in capturing high quality midair photos and videos by providing users to adjust key parameters like ISO, shutter speed, aperture, and white balance. Properly configuring these settings helps achieve the best exposure, clarity, and color accuracy based on lighting conditions and shooting environments. Whether filming in bright daylight or low-light scenarios, understanding manual and automatic settings can increase image sharpness and reduce noise. Additionally, features like HDR, frame rate selection, and resolution adjustments contribute to professional-grade results. Mastering drone camera settings ensures greater creative control and stunning visuals from every flight.
1. Drone camera settings: Resolution
- How to Use:
- Resolution is typically adjustable through the drone’s camera app or controller settings.
- Choose 4K for the highest level of detail, 1080p for standard quality, or 720p for lower storage requirements.
- Details:
- 4K: Captures high-definition images and video, suitable for professional use or content requiring cropping and post-production.
- 1080p: Standard for most casual videos, sharing on social media, and general video use.
- 720p: Lower resolution, good for quick editing and uploading but lacks fine detail.
- Pros:
- Higher resolution provides better image clarity, especially for editing or cropping.
- 4K is great for cinematic shots and professional video production.
- Cons:
- 4K footage requires large file sizes, making it difficult to store and process.
- Lower resolutions result in less detail and may look pixelated on large screens.
2. Drone camera settings: Frame Rate (fps)
- How to Use:
- Adjust the fps setting based on how smooth or detailed you want the video to be.
- Use 24fps for cinematic shots, 30fps for standard video, and 60fps or higher for smooth motion or slow-motion footage.
- Details:
- 24fps: Common in the film industry for a cinematic look.
- 30fps: Standard video frame rate for most drones and compatible with most playback devices.
- 60fps and above: Used for capturing smooth motion and for creating slow-motion video.
- Pros:
- High fps (60fps, 120fps) results in smooth and fluid video playback.
- 24fps provides a more traditional film-like look.
- Cons:
- Higher frame rates consume more storage and may require more processing power.
- Lower frame rates like 24fps can appear jerky in fast-moving scenarios.
3. Drone camera settings: ISO (Light Sensitivity)
- How to Use:
- Adjust ISO manually or set it to Auto.
- Low ISO (100-400) for well-lit environments and high ISO (800-1600 or more) in low-light conditions.
- Details:
- Low ISO: Prevents noise and grain, offering cleaner images. Ideal for bright conditions.
- High ISO: Increases exposure in low-light environments but introduces noise, reducing quality.
- Pros:
- Low ISO provides sharp, crisp images, even in bright daylight.
- Higher ISO allows shooting in low-light but can lead to grainy footage.
- Cons:
- High ISO can produce visible noise in images and videos.
- Auto ISO may not always provide optimal exposure settings in tricky lighting.
4. Drone camera settings: Shutter Speed
- How to Use:
- Set shutter speed according to motion (e.g., 1/60 for standard video, 1/1000 for freezing fast-moving objects, or 1/30 for artistic motion blur).
- Details:
- Fast shutter speed (1/1000, 1/500): Freezes fast-moving objects, great for action scenes.
- Slow shutter speed (1/30, 1/60): Adds motion blur, which can make moving subjects appear more dynamic.
- Pros:
- Fast shutter speeds freeze action, ideal for sports or wildlife.
- Slow shutter speeds allow for creative effects, such as capturing movement in flowing water or light trails.
- Cons:
- Slow shutter speeds may lead to underexposure in bright conditions.
- High shutter speeds may underexpose in low-light environments.
5. Drone camera settings: Aperture (F-Stop)
- How to Use:
- Adjust aperture to control the amount of light entering the camera.
- A lower f-stop (e.g., f/2.8) allows more light in and is better for low light, while a higher f-stop (e.g., f/11) reduces light and provides more depth of field.
- Details:
- Low f-stop (e.g., f/2.8): Ideal for low light and blurred backgrounds (shallow depth of field).
- High f-stop (e.g., f/11): Best for shooting in bright conditions or when you want everything in focus.
- Pros:
- Low f-stop is perfect for isolating subjects with a blurred background.
- High f-stop provides sharper images with greater focus depth.
- Cons:
- Many drones lack adjustable apertures, limiting creative control.
- High f-stop may result in underexposure in darker environments.
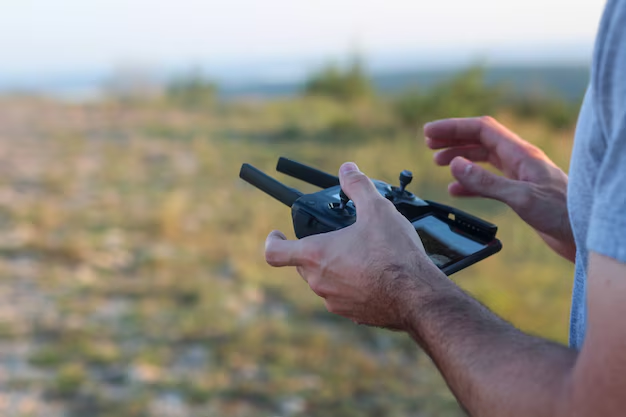
6. Drone camera settings: White Balance
- How to Use:
- Adjust to Auto, or manually set the color temperature (e.g., 5000-6500K for daylight or 3200K for tungsten lighting).
- Set Auto White Balance (AWB) for dynamic lighting or adjust Kelvin values for precise color tones.
- Details:
- Auto White Balance: Automatically adjusts to different light sources but can sometimes result in unnatural colors.
- Manual White Balance: Allows fine-tuned control over the color temperature based on ambient light.
- Pros:
- AWB is convenient and adjusts automatically to various light conditions.
- Manual settings provide more accurate and consistent color reproduction, especially for professional work.
- Cons:
- AWB may struggle with unusual lighting, leading to color inaccuracies.
- Manual settings require knowledge of light temperature and can be time-consuming to adjust.
7. Drone camera settings: Exposure Compensation (EV)
- How to Use:
- Use EV settings to adjust the exposure of your image. Increase EV (+1, +2) for brighter shots and decrease EV (-1, -2) for darker images.
- Details:
- Positive EV: Brightens the image by adding more light.
- Negative EV: Reduces exposure and darkens the image, useful in high-contrast scenarios.
- Pros:
- Quick and easy adjustment without changing core camera settings.
- Useful in challenging lighting situations, like shooting into the sun.
- Cons:
- Overuse of EV compensation can lead to overexposed or underexposed images.
8. Drone camera settings: Focus Mode
- How to Use:
- Set to Auto Focus (AF) for general use or Manual Focus (MF) for specific focus points.
- AF is ideal for moving subjects, while MF is best for static or detailed shots.
- Details:
- AF: Automatically focuses on subjects, but may struggle in low-light or high-contrast scenes.
- MF: Gives the user full control over the focus, useful in controlled environments.
- Pros:
- AF is fast and convenient for casual use.
- MF ensures precise focus, especially for photography or low-light environments.
- Cons:
- AF can miss focus in low-contrast or challenging lighting.
- MF requires manual intervention, which can slow down shooting.
9. Drone camera settings: Color Profiles
- How to Use:
- Choose Standard for vibrant, out-of-the-box footage or D-Log / D-Cine like for footage that requires color grading.
- Details:
- Standard: Provides vivid and accurate colors but limits editing flexibility.
- D-Log/D-Cine like: Provides a flat color profile for maximum dynamic range, perfect for color grading in post-production.
- Pros:
- Standard is quick, vibrant, and ready for use without editing.
- D-Log/D-Cine like offers superior flexibility for professional editing and grading.
- Cons:
- Standard colors may look oversaturated and can’t be adjusted in post-production.
- D-Log footage requires color grading skills and may need more post-processing time.
10. Drone camera settings: ND Filters (Neutral Density Filters)
- How to Use:
- Attach ND filters to reduce light entering the camera, allowing you to use slower shutter speeds in bright environments.
- Use ND8, ND16, or ND32 depending on the light conditions.
- Details:
- ND8: Reduces exposure by 3 stops, ideal for moderately bright conditions.
- ND16: Reduces exposure by 4 stops, ideal for shooting in very bright conditions.
- ND32: Reduces exposure by 5 stops, perfect for extreme sunlight.
- Pros:
- ND filters allow for cinematic motion blur without overexposing the image.
- Essential for creating professional-looking video in bright conditions.
- Cons:
- ND filters require additional equipment.
- Overuse can result in underexposure, requiring adjustments to other settings.
11. Drone camera settings: Gimbal Settings
- How to Use:
- Adjust gimbal settings to control the drone’s camera tilt, pitch, or yaw.
- Set to Follow Mode for smooth footage or FPV Mode for more dynamic camera movements.
- Details:
- Follow Mode: Keeps the camera steady while the drone moves, ideal for stable shots.
- FPV Mode: Allows the camera to move with the drone, providing a first-person view, great for dynamic shots and action sequences.
- Pros:
- Follow mode ensures smooth footage even in turbulent conditions.
- FPV mode offers creative flexibility and immersive shots.
- Cons:
- Follow Mode may not work well in fast-moving environments.
- FPV mode can be jarring for viewers and requires a steady hand to control.
Conclusion:
In conclusion, drone camera settings are essential for achieving the best possible image and video quality in various shooting conditions. By adjusting key parameters like ISO, shutter speed, aperture, and white balance, users can enhance exposure, sharpness, and color accuracy. Understanding how to fine-tune these settings—whether manually or using automated modes—allows for greater creative control and professional-grade results. As drone technology advances, mastering camera settings will help pilots capture stunning aerial visuals with precision and clarity, making every shot more dynamic and visually appealing.

